


How to Build a Recovery Sanctuary at Home: 2026 Guide
Table of Contents
- Step 1: Define Your Recovery Space Goals and Constraints
- Step 2: Home Recovery Room Design and Spatial Layout
- Step 3: Home Sauna and Cold Plunge Setup
- Step 4: Permits, Electrical Load, and Plumbing Requirements
- Step 5: Small Home Wellness Room Ideas That Still Work
- Step 6: Cold Plunge Maintenance and Long-Term Costs
- Frequently Asked Questions
Last Updated: October 9, 2026
Step 1: Define Your Recovery Space Goals and Constraints
A recovery sanctuary is a dedicated space built around a repeatable routine of heat, cold, light, and rest. It starts with one question: what will you actually do in it, and how often?
Most first-time builds follow the same pattern: people buy one piece of equipment, run out of room, then buy a second that fits neither the space nor the routine.
Map the Routine Before the Room
Write down your weekly routine in plain terms: which sessions happen daily, and which two or three times a week?
Common setups include:
- A short morning cold plunge, three to five days a week
- An evening sauna session, two to four times a week
- A red light panel session, most days, ten to twenty minutes
Your list decides the room: a daily plunge needs drainage and water access, a twice-weekly sauna needs wall clearance and a dedicated circuit, and a panel needs a wall with open floor in front of it.

Set a Realistic Budget and Timeline
Most builds run in three phases: equipment, room prep, and installation. Room prep is the part people underestimate.
Plan for these costs before you order gear:
- Electrical work, if you need a new circuit
- Floor reinforcement or a moisture barrier
- Ventilation or a dehumidifier
A single-room build typically takes four to eight weeks if equipment is in stock; electrical work and permits are the slowest steps.
Step 2: Home Recovery Room Design and Spatial Layout
Home recovery room design comes down to three numbers: wall clearance, floor loading, and circulation path. Get those right and the layout falls into place.
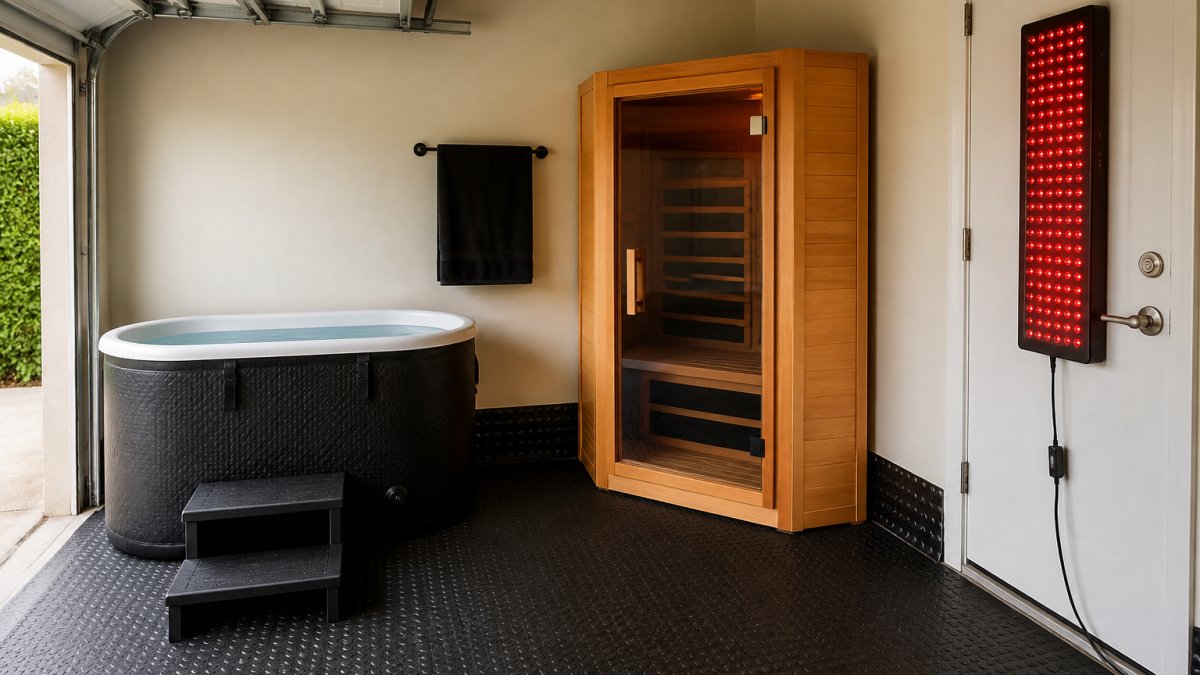
Wall Clearance, Floor Loading, and Circulation Paths
Wall clearance depends on the equipment: massage chairs need a few inches behind them, while saunas need room for the door swing and heater access.
Floor loading matters more than most people expect. A filled cold plunge can weigh close to half a ton, the Modtub 2.0 weighs about 850 lb filled, so you need a slab, reinforced joists, or a ground-level room.

Circulation paths should be at least 36 inches wide, giving you room to walk past equipment, carry water, and open lids.
Sketch the room on graph paper: mark each footprint, draw your walking path, and move anything the path crosses.
Step 3: Home Sauna and Cold Plunge Setup
Home sauna and cold plunge setup works best when both pieces share one footprint plan, with heat and cold within a few steps of each other.
Choosing Equipment That Fits the Same Footprint
Measure the total floor area you can give up, then divide it. A common split is 60 percent sauna and 40 percent plunge, plus a dry staging area for towels and a bench.
A few practical notes from the specs we publish:
- The Modtub 2.0 needs about 75 inches of length for the tub plus the chiller beside it.
- The Drift Inflatable Cold Plunge runs on a standard 100-120V outlet, so it needs no electrician.
- The RevX Acrylic X Tub pairs a 34-inch-deep tub with a separate chiller cabinet and runs on 110V.
That last point matters in small rooms. A hanging panel adds a full routine without adding a footprint.

Step 4: Permits, Electrical Load, and Plumbing Requirements
Permits, electrical load, and plumbing decide whether your build is a weekend project or a month-long one. Handle them before equipment arrives.
Start with your local building department.
Electrical load is the next check. Add up the draw of every device:
| Equipment | Typical Power Need | Circuit Note |
|---|---|---|
| Inflatable plunge with chiller | 100-120V | Standard outlet |
| Acrylic plunge with chiller | 110V, up to 11 amps | Dedicated 15A circuit recommended |
| Infrared sauna | Varies by heater count | Often needs a dedicated circuit |
| Red light panel | Standard outlet | Low draw |
If the total exceeds what one circuit can carry, you need an electrician.
Plumbing requirements are lighter than most people assume. Many plunge systems need no plumbing at all, you fill with a hose and drain by pump or gravity.
Smart Home Integration and Acoustic Design
Smart home integration is one of the easiest wins in a recovery room. WiFi-controlled chillers let you set water temperature from your phone before you walk in; the Drift and RevX units both support app control.
Acoustic design is the angle most guides skip. Heaters, chillers, and pumps all make noise, and a hard-surfaced room amplifies it. A few fixes help:
- Add an acoustic panel or heavy rug on one wall
- Seal the door with weatherstripping
- Isolate the chiller on a rubber mat
Soundproofing also keeps session noise from carrying through the house, which matters if you plunge early or sauna late.
Step 5: Small Home Wellness Room Ideas That Still Work
Small home wellness room ideas work when you stack functions instead of spreading them out. A 6-by-8-foot corner can hold a full routine if you plan it well: each item has a footprint, a clearance zone, and a power need, and those three numbers decide what fits.
Modtub 2.0 Cold Plunge System →
Start with a simple inventory: write down every item you want, then the footprint, wall clearance, and circuit it needs. If two items want the same wall and circuit, one moves.
Four Layouts That Fit Real Rooms
- The vertical stack. Hang a red light panel on the wall, place a compact plunge below it, and store towels in a slim cabinet. The panel adds a full routine with zero floor footprint, which is the single biggest win in a tight room.
- The corner plunge. Tuck an inflatable tub into a corner and roll it out only for sessions. The Drift Inflatable Cold Plunge runs on a standard 100-120V outlet, so no electrician is needed and the tub can be deflated between uses.
- The shared gym corner. Put a plunge beside your existing weights rack and use one rubber floor for both. This works best when the plunge has its own circuit so a chiller cycle does not compete with anything else on the wall.
The Three Numbers That Decide What Fits
Before committing to a layout, check these three numbers against your room:
| Constraint | Target | Why It Matters |
|---|---|---|
| Circulation path | At least 36 inches | Room to walk past equipment, carry water, and open lids |
| Wall clearance | Per spec sheet, per item | Sauna doors swing; heaters need access; panels need open floor in front |
| Floor loading | Slab, reinforced joists, or ground level | A filled plunge can weigh close to half a ton |
The Modtub 2.0, for example, weighs about 850 lb filled and needs roughly 75 inches of length for the tub plus the chiller beside it, a number that rules out most closets and many upstairs bathrooms.
Small-Space Equipment That Earns Its Footprint
A few specs matter more than others when the room is tight:
- The Drift Inflatable Cold Plunge packs down and runs on standard power, which makes it the most flexible option in a shared or rented space.
- The RevX Acrylic X Tub pairs a 34-inch-deep tub with a separate chiller cabinet and runs on 110V, so the tub and chiller can be placed on different walls if the cord run allows.
- The Hooga PRO1500 panel hangs on a door or wall and needs no floor space at all.
A hanging panel adds a full routine without adding a footprint, and an inflatable plunge can be stored between sessions, letting a room under 100 square feet hold heat, cold, and light in one place.
Condo and Apartment Constraints
For condo owners, wall clearance is the real constraint, but not the only one. Two more checks matter:
- Floor loading. Confirm what your floor can take before you fill a tub. A filled plunge is heavy, and a second-floor unit is not the same as a ground-floor slab.
- Building rules. Check your lease or HOA rules on water use, noise, and any restriction on equipment that draws significant power. This is the step most small-space guides skip entirely.
If both checks pass, an inflatable plunge plus a hanging panel is usually the most workable combination. If either fails, a panel-only setup still delivers a daily routine without adding weight or water.
Stack For Wellness builds its catalog around this problem. Every item we carry is chosen to work beside the others, so a small room can hold a full recovery stack.
Step 6: Cold Plunge Maintenance and Long-Term Costs
Cold plunge maintenance is simple but not optional: skip it and water quality drops fast, shortening the life of your chiller and filter. The bigger miss in most guides is the recurring cost that shows up after the build, predictable if you plan for it.
The weekly routine takes about fifteen minutes:
- Check the water clarity and temperature.
- Test and balance the water chemistry.
- Rinse or replace the filter as needed.
- Wipe the shell and lid.
- Check hoses and fittings for leaks.
Filtration, Water Care, and the Maintenance Schedule
Most plunge systems use a pleated or micron-rated filter plus ozone or UV sanitation. The Modtub 2.0 uses a 50-micron pleated filter with bypass valves, the Drift uses ozone with replaceable filters, and the RevX pairs UV and ozone with a 20-micron filter.
Build a schedule around three cycles instead of guessing:
| Cycle | Task | Frequency |
|---|---|---|
| Weekly | Water test, chemistry balance, filter rinse, shell wipe | 1x per week |
| Monthly | Deep filter clean or replacement, hose and fitting inspection | 1x per month |
| Quarterly | Full water change, chiller coil inspection, ozone/UV lamp check | Every 8-12 weeks |
Log the dates. A recurring phone reminder plus a one-line note per session removes the guesswork and makes warranty conversations easier if a pump or heater needs service.
What Long-Term Ownership Actually Costs
Recurring costs fall into four buckets. None are large alone, but they add up over a year:
- Replacement filters. The most frequent expense. Pleated and micron-rated cartridges are typically replaced every few months depending on use and how well chemistry is held.
- Water changes. Every few weeks in heavy use, longer in light use. Cost is water plus any chemistry you add back.
- Electricity for the chiller. The chiller is the largest continuous draw in the room. It runs hardest in summer and when the tub sits in a warm space. Placing the tub in a cooler, shaded area reduces run time.
A useful rule of thumb: the chiller is the cost driver, the filter is the chore driver. To lower ongoing spend, focus on where the tub sits and how well you hold water chemistry, not on cheaper filters.
Energy Draw and Circuit Planning
Chiller draw varies by model and workload. The Drift Inflatable Cold Plunge runs on a standard 100-120V outlet; the RevX Acrylic X Tub runs on 110V and pulls up to 11 amps, which is why a dedicated 15A circuit is recommended.
A dedicated circuit is not just a code question but a convenience one: sharing with a garage freezer or shop vac means the chiller can trip a breaker mid-session, and that interruption ruins a routine.
Sauna and Panel Maintenance
Sauna upkeep is lighter than plunge upkeep but not zero: wipe benches after sessions, leave the door cracked to dry the interior, and vacuum the heater elements periodically.
Red light panels are the lowest-maintenance item in the room. Keep the face clean, avoid spraying liquid on the LEDs, and confirm the timer and intensity settings still match your usual protocol.
CDC guidance on healthy swimming and water quality
Frequently Asked Questions
How do you build a recovery sanctuary at home?
Start by mapping your routine, then measure the room and confirm floor loading, wall clearance, and circuit capacity before buying anything. Run a dedicated circuit for high-draw equipment, add a moisture barrier and drainage where water is involved, and plan ventilation for heat and humidity. Build in phases: cold plunge and sauna first, then lighting and acoustic treatments. A 10x12-foot spare room or garage corner handles a compact tub, a two-person sauna, and a light panel.
How much space do you need for a home sauna and cold plunge setup?
Plan for roughly 75 inches of length for a compact plunge tub plus its chiller beside it, since the chiller needs airflow and service access. A two-person infrared sauna typically needs a footprint around 4x4 feet with a few inches of clearance on each side. A 10x12-foot room comfortably fits both plus a light therapy panel and a bench. In a smaller space, place the sauna and tub on opposite walls and keep a 36-inch walking path between them.
How do you maintain a cold plunge at home?
Set a maintenance schedule from day one. Check and replace the filter on the interval your unit specifies, test and balance water chemistry weekly, and wipe the shell with a soft cloth. Units with ozone plus filtration, like the Drift inflatable plunge, hold water quality longer between changes. The Modtub 2.0 uses a 50-micron pleated filter with bypass valves, and the RevX X Tub pairs a separate 20-micron filter with UV and ozone sanitation. Budget for replacement filters and periodic water changes.
Can you create a recovery sanctuary in a small room?
Yes, if you choose equipment by footprint rather than by feature list. An inflatable plunge like the Drift packs down to a 34-pound tub and runs on a standard 100-120V outlet with no electrician or permit needed. A light therapy panel mounts on a door with the included hanging kit, so it takes no floor space. Stack vertical storage, use a moisture-resistant mat instead of a full wet room, and keep one clear path through the room.
What should you consider before installing an infrared sauna at home?
Confirm three things first: the circuit, the clearance, and the floor. Saunas draw significant current, so verify your panel can support a dedicated circuit and consult a licensed electrician. Leave the wall clearance the manufacturer specifies, since infrared panels need air movement around the housing. Check that the floor can carry the loaded weight, and add a moisture barrier if the room shares a wall with a living space. Ventilation matters too, especially in a sealed room.


